

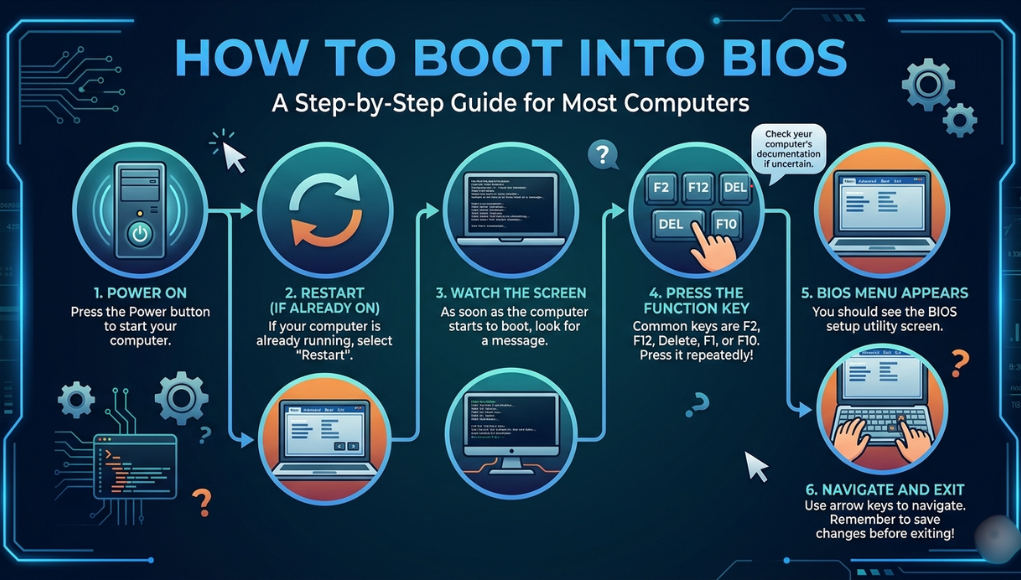
Accessing your computer’s firmware may sound technical, but learning how to boot into BIOS is one of the most essential skills for anyone using a PC. Whether you are troubleshooting startup issues, installing a new operating system, or optimizing performance, the BIOS (or modern UEFI firmware) acts as the control center of your system.
It is the first layer of software that communicates directly with your hardware, ensuring every component from your processor to your storage drives functions correctly before the operating system even begins to load, which is why understanding How To Boot Into BIOS? is essential for accessing and controlling these critical system functions.
This comprehensive guide explains everything in depth, from basic concepts to advanced configuration, so you can confidently understand and use BIOS settings. In addition, it will help you recognize when and why accessing firmware is necessary, how different systems handle BIOS access, and what precautions to take before making changes.
| Category | Description | Key Options / Features | Why It Matters | Best Practice |
| BIOS / UEFI Firmware | Core system software that initializes hardware before the OS loads | POST, hardware detection, firmware interface | Ensures the system boots correctly | Keep firmware updated safely |
| Access Methods | Ways to enter BIOS during startup or via OS | Del, F2, F10, Esc, Windows Advanced Startup | Enables access to system-level controls | Learn your device-specific key |
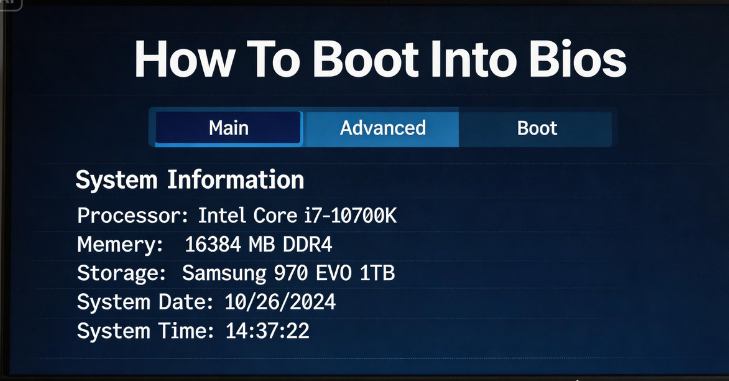
| Main Menu | Displays basic system information | CPU type, RAM, BIOS version | Confirms hardware recognition | Use for system verification |
| Boot Menu | Controls system startup sequence | Boot order, USB boot, device priority | Essential for OS installation and recovery | Set the correct primary boot device |
| Advanced Settings | Provides deeper hardware configuration | CPU settings, virtualization, peripherals | Allows performance tuning and hardware control | Modify only if knowledgeable |
| Security Settings | Protects system access and data | BIOS password, Secure Boot, TPM | Prevents unauthorized access and enhances security | Enable security features where needed |
| Exit Options | Manages saving or discarding changes | Save & Exit, Discard Changes, Load Defaults | Ensures safe configuration management | Double-check before saving |
| Monitor & Performance | Controls system performance aspects | Fan control, overclocking, XMP | Improves speed and efficiency | Avoid extreme changes without knowledge |
| Troubleshooting | Helps resolve boot and hardware issues | Reset defaults, turn off fast boot | Fixes startup failures | Use the default reset when unsure |
| Compatibility Settings | Ensures the system works with the OS and hardware | Legacy mode, UEFI mode, and device compatibility | Prevents boot errors and hardware conflicts | Match settings with OS requirements |
What Is BIOS and Why Does It Matter
BIOS, short for Basic Input/Output System, is firmware embedded on your computer’s motherboard. It initializes hardware components and ensures your system boots properly before handing control to the operating system.
Modern systems now use UEFI (Unified Extensible Firmware Interface), which is faster, more secure, and offers a user-friendly interface compared to traditional BIOS.
Key Functions of BIOS/UEFI
- Initializes hardware like CPU, RAM, and storage devices
- Performs POST (Power-On Self-Test)
- Loads the operating system
- Allows configuration of system-level settings
Understanding how to boot into BIOS gives you access to these controls, making it easier to manage your system effectively.
How To Boot Into BIOS? Step-by-Step Methods
The process of accessing BIOS varies depending on your system type and manufacturer, but the core idea remains the same.
Method 1: Using Keyboard Shortcut During Startup
The most common way to enter the BIOS is to press a specific key immediately after powering on your computer.
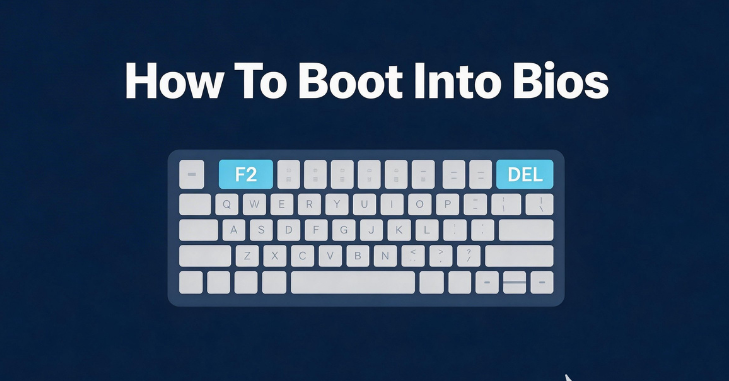
Common BIOS Keys:
- Delete (Del)
- F2
- F10
- Esc
Steps:
- Turn off your computer
- Power it on
- Repeatedly press the BIOS key before the OS loads
Timing is crucial—pressing too late will boot into the operating system instead.
Method 2: Accessing BIOS Through Windows Settings
Modern systems provide an easier method via advanced startup options.
Steps:
- Open Settings
- Go to Update & Security
- Select Recovery
- Click “Restart Now” under Advanced Startup
- Choose Troubleshoot → Advanced Options → UEFI Firmware Settings
This method is particularly useful if you struggle with manual key timing.
Method 3: Boot Menu Shortcut
Some systems allow access through a boot menu.
Steps:
- Restart your PC
- Press the boot menu key (often F12 or Esc)
- Select “Enter Setup” or BIOS
This is another practical way to understand how to boot into BIOS without navigating Windows.
BIOS vs UEFI: What’s the Difference?
Understanding the difference helps you navigate modern systems more effectively.
| Feature | BIOS | UEFI |
| Interface | Text-based | Graphical UI |
| Boot Speed | Slower | Faster |
| Disk Support | Up to 2TB | Supports large drives |
| Security | Basic | Secure Boot support |
| Mouse Support | No | Yes |
Most modern PCs use UEFI, but the process of booting into BIOS remains similar.
Exploring BIOS Menu Options
Once inside, you will encounter several menus that allow you to configure your system at a fundamental level. Each section serves a specific purpose, giving you control over hardware behavior, boot processes, and security features.
1. Main Menu
The Main Menu displays essential system information, providing a quick overview of your hardware configuration. Here, you can view details such as the CPU type, installed RAM, and the current BIOS version. This section is primarily informational and helps you verify that all components are recognized correctly by the system.
2. Boot Menu
The Boot Menu controls how your system starts and determines which device is used to load the operating system. It includes key options such as setting the boot order priority, turning specific boot devices on or off, and configuring USB boot settings. This menu is one of the most commonly accessed areas, especially for users who want to install Windows or Linux or boot from external drives, which is a major reason many people learn how to boot into BIOS. If you want to go deeper, read Voluntary Manslaughter Explained.
3. Advanced Settings
The Advanced Settings section provides deeper control over hardware features and system performance. It includes options for CPU configuration, turning virtualization on or off, and managing integrated peripherals, such as onboard audio or network controllers. These settings are typically used by advanced users who want to fine-tune system behavior.
4. Security Settings
The Security Settings menu is designed to protect your system from unauthorized access and threats. In this section, you can configure BIOS passwords, enable Secure Boot to prevent untrusted software from loading, and manage TPM (Trusted Platform Module) settings, all of which are essential for modern security features like encryption.
5. Exit Menu
The Exit Menu lets you manage any changes you made during your session. You can choose to save changes and exit, discard changes if you are unsure about modifications, or reset all settings to their default configuration. This ensures that you have full control over whether your adjustments are applied or reverted.
When Should You Boot Into BIOS?
There are several scenarios where knowing how to boot into BIOS becomes essential.
Common Use Cases
- Installing a new operating system
- Changing boot priority (USB, SSD, HDD)
- Enabling virtualization for virtual machines
- Fixing startup or boot errors
- Overclocking CPU or RAM
Important BIOS Settings Explained
Understanding settings helps you avoid accidentally misconfiguring your system.
Boot Order
Determines which device your PC uses to start.
Secure Boot
Prevents unauthorized operating systems from loading.
XMP Profiles
Improves RAM performance by enabling higher speeds.
Virtualization
Required for software like virtual machines.
Tips for Safe BIOS Usage
Working in the BIOS requires caution, as incorrect settings can negatively affect system stability and performance. It is always recommended to note the default settings before making any changes so you can easily revert if needed.
Avoid modifying options you do not fully understand, as even small changes can cause boot issues or hardware conflicts. Save changes only when necessary to prevent unintended configurations, and when updating the BIOS, always use the manufacturer’s official tools to ensure a safe and reliable process.
Troubleshooting BIOS Access Issues
Sometimes accessing the BIOS can be tricky.
Common Problems and Solutions
- Fast Boot Enabled: Disable it from Windows settings
- Wrong Key: Check manufacturer-specific keys
- Keyboard Not Detected: Use a wired keyboard
- System Boots Too Fast: Use Windows Advanced Startup
Understanding these issues improves your ability to boot into BIOS efficiently.
Manufacturer-Specific BIOS Keys
Different brands use different keys.
| Brand | BIOS Key | Boot Menu Key |
| HP | F10 / Esc | Esc |
| Dell | F2 | F12 |
| Lenovo | F1 / F2 | F12 |
| ASUS | Del / F2 | F8 |
| Acer | F2 | F12 |
Knowing your system’s key makes accessing the BIOS much faster.
Advanced BIOS Features for Power Users

For experienced users, BIOS offers powerful customization options.
Overclocking
- Increase CPU speed
- Boost performance
- Requires proper cooling
Fan Control
- Adjust cooling performance
- Reduce noise
Storage Configuration
- Switch between AHCI and RAID modes
- Optimize SSD performance
Conclusion
Learning how to boot into BIOS gives you deeper control over your computer. From managing boot settings to optimizing performance, BIOS serves as the foundation of your system’s operation.
Whether you are a beginner or an advanced user, understanding firmware, boot menus, and system configuration settings ensures you can troubleshoot issues, enhance performance, and maintain your PC with confidence. Mastering BIOS is not just about accessing a menu—it’s about taking full control of your computer’s capabilities.
Want to know about 144Hz 4K Monitors: The Ultimate Guide for Gaming, Productivity, HDR, Ultra-Smooth Check out our Tech category.
FAQs
Only when needed for configuration, troubleshooting, or updates.
It can cause system instability, but you can reset to the default settings.
Yes, UEFI is the modern version with more features and a graphical interface.
Using the Windows advanced startup option is the easiest method for most users.